Fat Quarter Gang – Color Me Retro Mini Quilt by Diary of a Quilter

FatQuarterGANG_banner400pxBLUE
Hello fellow Art Gallery Fabric lovers! I'm Amy Smart from Diary of a Quilter and today I am sharing a quick little table topper project using one of my new, favorite collections, Color Me Retro by Jeni Baker.

I have been collecting vintage pyrex and other dishes for a while now so when I heard Jeni was designing a vintage-dishware-inspired fabric collection, I knew I would love it! And I was right.

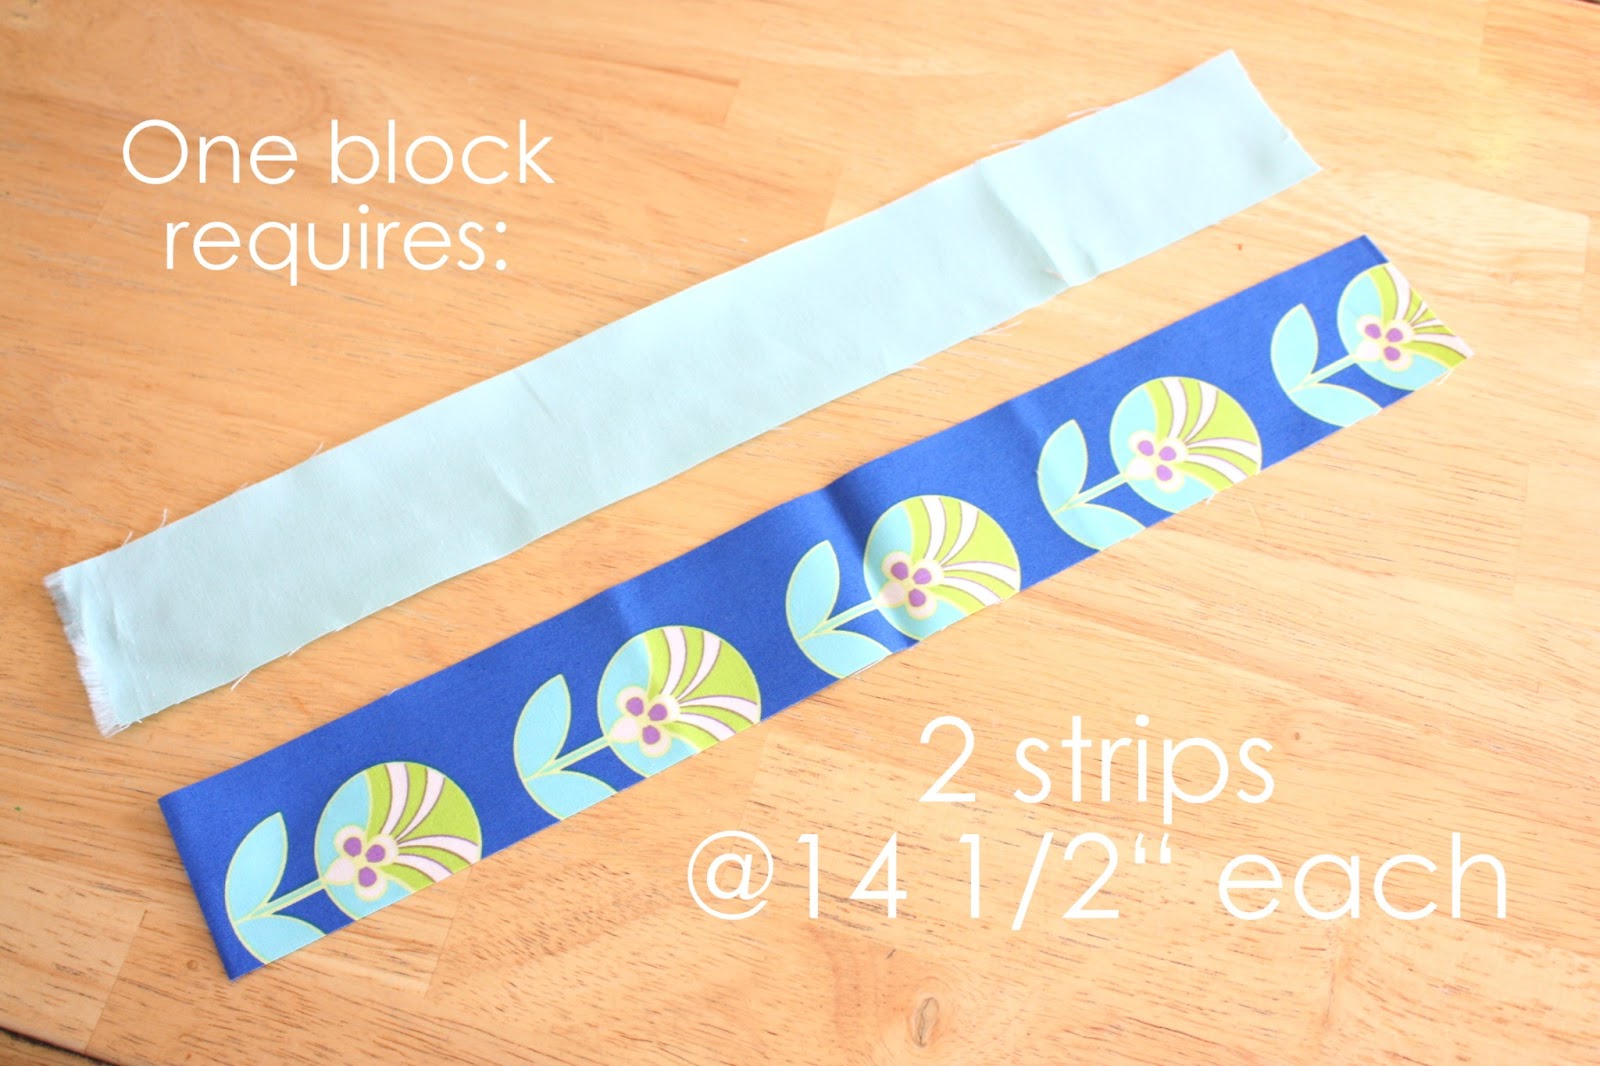
Playing with this fabric made me so in the mood for spring! I'm glad I have some cheerful color on my table to keep my hopes up. Here are the fabric requirements for this 24" x 24" square table topper. (The same yardage will work for a 12" x 48" table runner.)

  •  10 Fat Quarters from Color Me Retro collection (I used all 10 because I wanted to feature the entire collection, but you really only need 4 fat quarters worth of yardage for this project.)
  • 5/8 yard solid turquoise. (The coordinating Pure Element is Fresh Water)

This project consists of one simple 6" pinwheel-type block. Each block requires 2 strips 2" x 14.5". I used the same solid as one of the strips in each block, but you could use a variety of fabrics if you like.
Sew strips together and press toward the print fabric. Carefully sub-cut into 4 units 3 1/2" square. 
 Rotate the units as pictured.
Sew units into two rows as pictured, pressing seams toward the print. Then sew two rows together to create a 6 1/2" (unfinished) block.
After center seam is sewn, "pop" the seam in the center of the block (un-pick a couple of the stitches). 
Press each seam (from assembling the 4 units) toward the print strip in a counter-clockwise direction. This will help seams match up when you go to sew your block together.
Create 15 more blocks. 


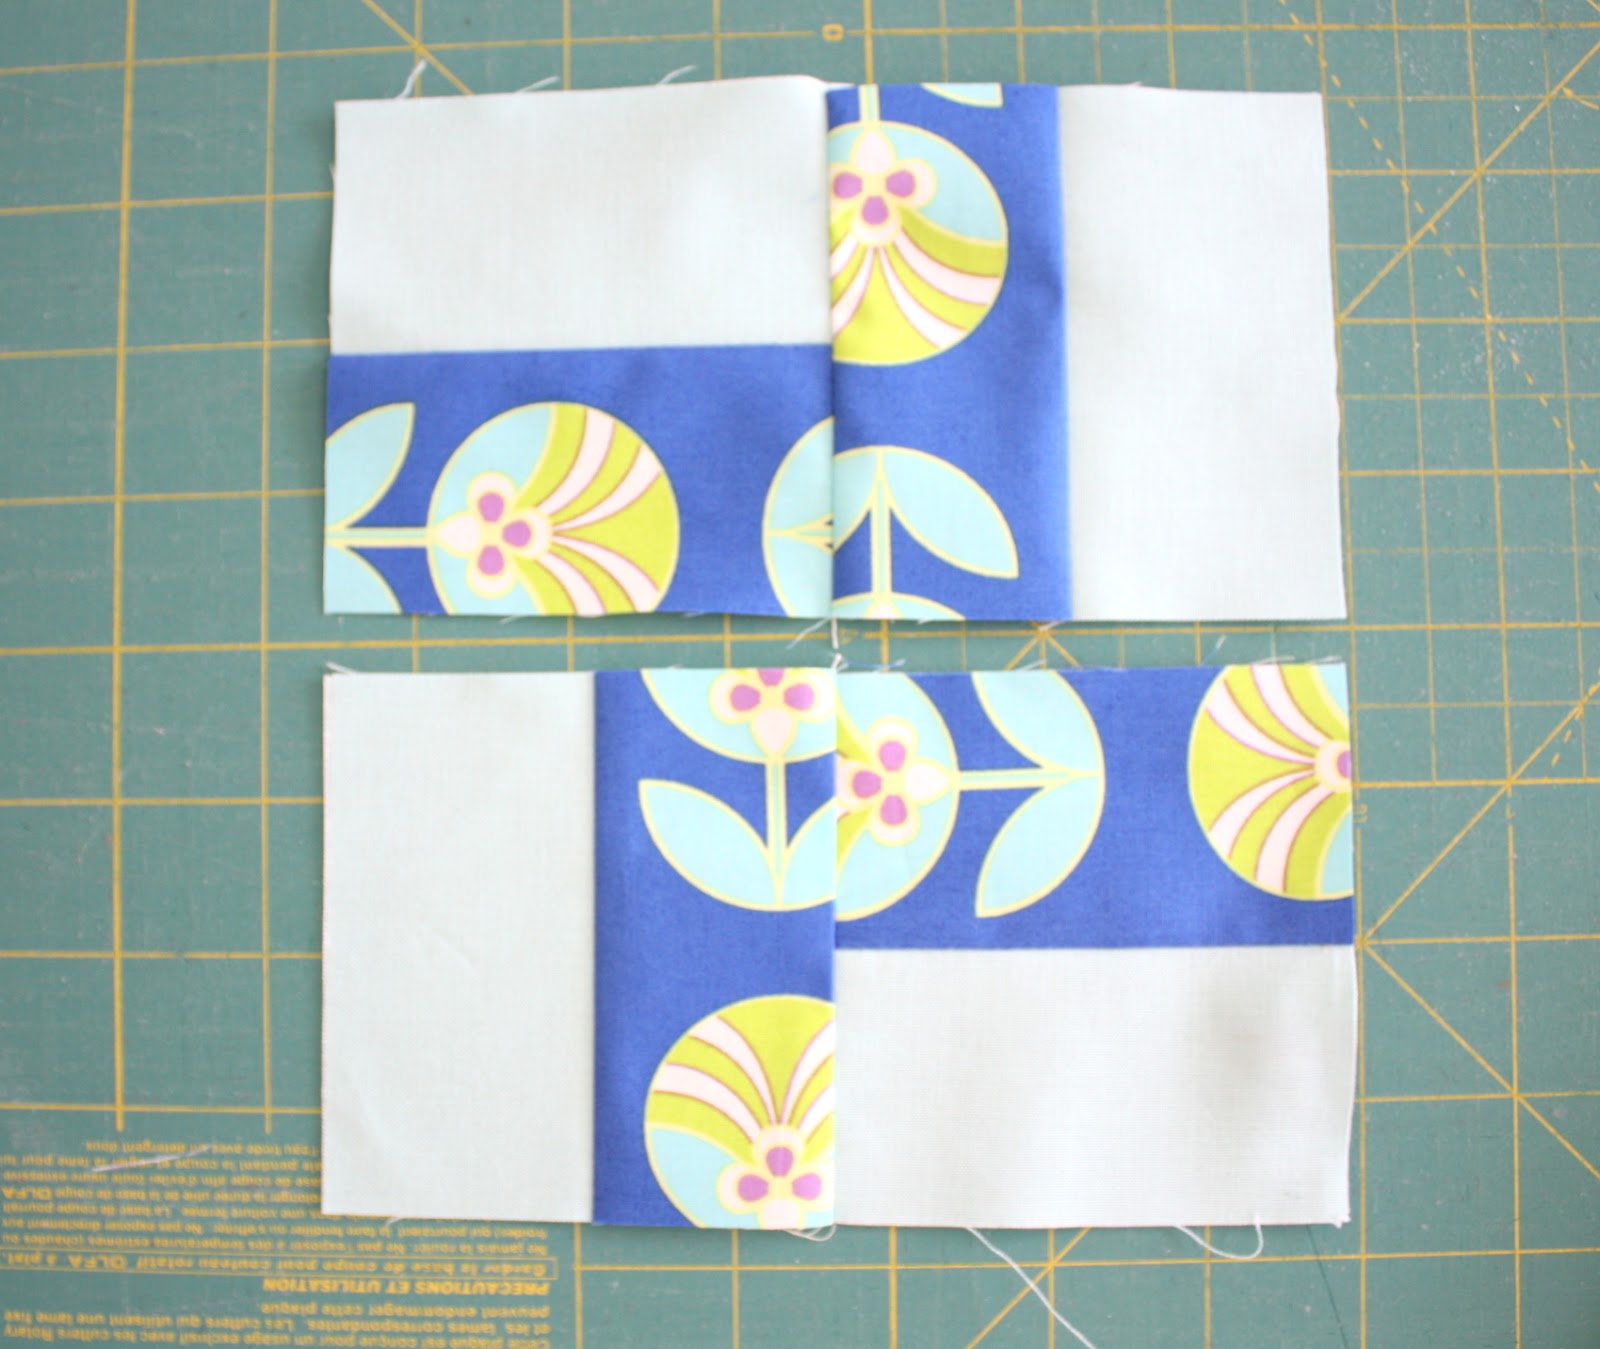
I sewed my blocks 4 across by 4 down to create a 24" x 24" square. You could also sew them 8 across by 2 down to create a 12" x 48" table runner.

I then used my remaining fat quarter prints to piece together a quilt back 27" x 27". (You could also use 3/4 yard of fabric for this backing.) I like that I can have a reversible option for my table.

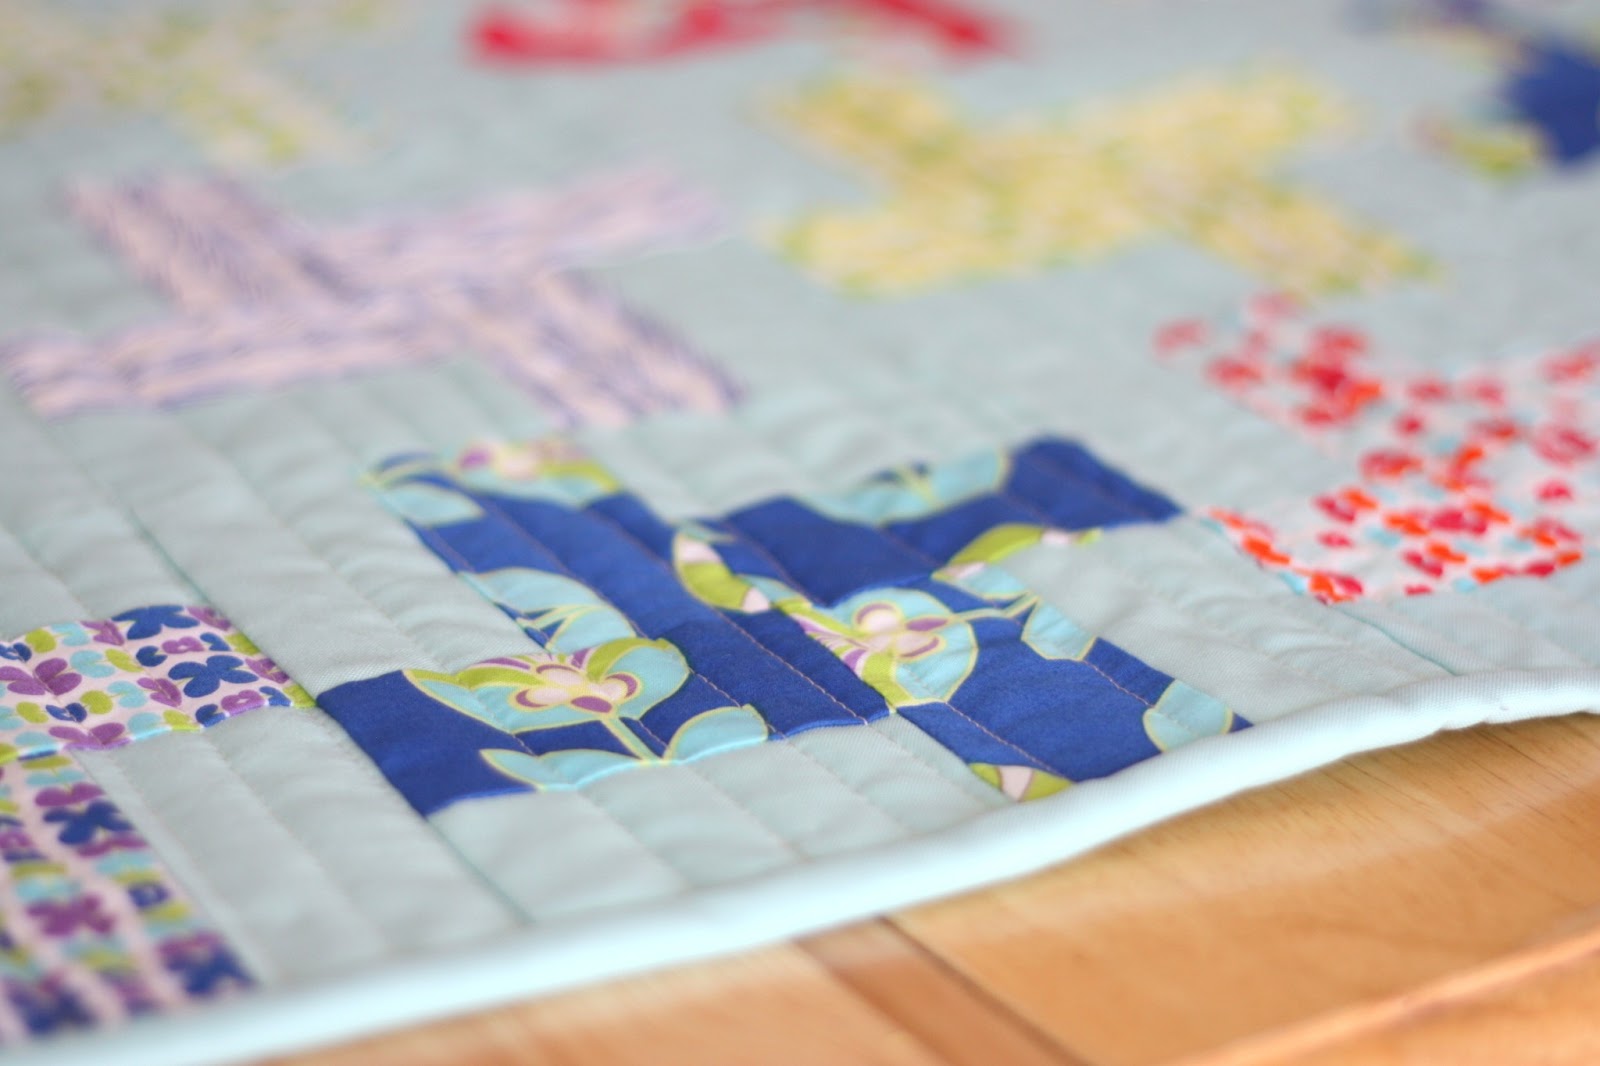
From there layer the top, batting and quilt back and quilt as desired. I used my walking foot to sew quilting lines 3/4" apart. When quilting is finished, trim excess batting and backing fabric so that edges are clean and square.

For the binding, cut 3 strips 2 1/2" wide from your remaining solid and sew them together end to end. Here is a binding tutorial if you need one.

And that's it! This is a quick pinwheel-type block if you want to make lots of blocks and create a bigger version of this look too.

Thanks for having me AGF! Don't forget! If you want to win your own stack of Color Me Retro fat quarters, visit my blog, Diary of a Quilter, and leave a comment on the Color Me Retro post. Giveaway will be open until Friday, February 22.

As always to be eligible to win you must follow us on your fav social media platform (Pinterest, Facebook, Twitter)and Subscribe to our blog to stay up to date on all things AGF & the Fat Quarter Gang!

And don't forget to add any projects you made from this (and the other fabulous Art Gallery Fat Quarter Gang tutes) to the flickr group!

Til next time.. Happy Sewing

Amy & The Fat Quarter Gang

13 responses to “Fat Quarter Gang – Color Me Retro Mini Quilt by Diary of a Quilter”

  1. Maureen Cracknell Avatar

    What a pretty mini, so perfect for Color Me Retro!!

    Like

  2. sophie Avatar

    loving this! I am a new quilter and had spotted those fabrics :) and Amy is fab : she makes the best tutorials! thank you! (I did subscribe :))

    Like

  3. Linda Kindy Avatar
    Linda Kindy

    Love this. With the light blue, would make a great baby boy quilt. Substitute a light pink and you’d have a baby girl quilt. I’ll definitely do this.

    Like

  4. Bernadine Kringel Avatar
    Bernadine Kringel

    Looking forward to this project. Just finished the 9 patch table topper tutorial that you posted for Valentine’s Day. Now I need to figure out how to upload the picture to Flikr. Thanks for the detailed tutorials, Amy. They are really great!

    Like

  5. WandaFish Avatar
    WandaFish

    Another inspiring tutorial from the wonderful Fat Quarter Gang – thank you!

    Like

  6. Iraelia Pernas Avatar
    Iraelia Pernas

    I just love the simplicity of the design and still looks complicated! Will love to get the bundle of fqs…
    cusypernas@gmail.com

    Like

  7. Nancy Sockwell Avatar
    Nancy Sockwell

    Love this fabric!

    Like

  8. Jane B Avatar
    Jane B

    Great tutorial! Such a simple block, but with many possibilities.

    Like

  9. Dorothy B. Avatar
    Dorothy B.

    Just bought the fabric to make the table top…Love the look and the fabric. The tutorial is great and easy to follow.

    Like

  10. Tracy Lucas Avatar

    This is lovely, great fabric and a good size for a beginner quilter like me!

    Like

  11. Judy Blinkenberg Avatar

    This is adorable, and it could be made just a little larger for a baby quilt. Thank you.

    Like

  12. Kathy Grom Avatar

    I cannot believe how quickly this went together. Thank you for the great instructions. Here is my version: http://sunshinesews.blogspot.com/2013/07/a-mini-quilt-in-red-white-and-blue.html
    I can’t wait to make a few more.

    Like

Leave a reply to Bernadine Kringel Cancel reply

We’re AGF

At Art Gallery Fabrics®, we aspire for the best, from creation to delivery with reliable quality, and top customer service. We believe strongly in the quality of the fabric that is transcended in our superior thread count and fine weave, our mills uphold sustainable printing methods and are OEKO-TEX certified 

Latest Lookbook

Let’s connect