
In the spirit of the weekend and the free time that comes with it, we leave you with a quick tutorial which we hope will come in handy. This one is especially great for novices, but can also get the sewing motor running for the experts out there too!
There's a saying in the tech-world that the best repair is not to cause
damage in the first place. However, that’s way easier said than done. Our devices are
always prone to damage; from dents to scratches, and the worst of all: shattered screens.
We thought we’d help you minimize the chance of these pesky little accidents by
sewing up a hanging charging station for your phone.
Next time your phone is in need of battery juice and there’s nothing
but the floor to set it on, use this pretty little holder. A
practical way to keep your phone cozy, cute and protected!
Let's begin with a list of the sizes and fabric quantities you'll need for this project:
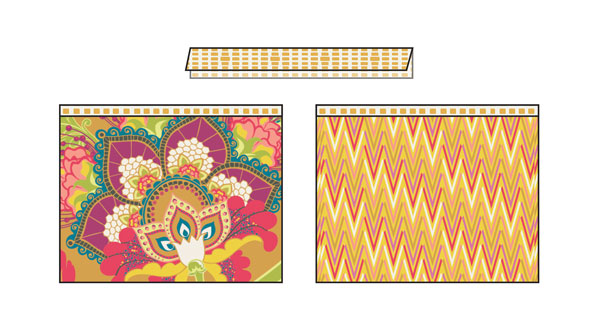
- (2) 5” x 7 ¾” rectangle of Honey (Pure Elements
Collection) - (1) 5” x 7 ¾” rectangle of batting
- (1) 4” x 5” rectangle of Artisan Ruby
(Rhapsodia Collection) - (1) 4” x 5” rectangle of Weaving Sol (Rhapsodia
Collection) - (2) 5” x 1” rectangle of Honeycomb (Squared
Elements Collection)

(Remember to sew all right sides together with a ¼" of seam
allowance.)
Let’s start by adding the binding to each pocket. To complete this you will need to Fold and Press piece 5
lengthwise, and attach that to pieces 3 and 4. When you’re done attaching the binding, you’re ready to put it
together with piece 1.
Take piece 3 and lay it on top of one of the
pieces that you cut for 1.
Then, align it perfectly as shown in the diagram below and sew down each side
as close to the edge as possible. Repeat this for piece 1 that was left and piece 4.
 Sew around both 1 pieces together, overlapping each
other with both right sides facing one another (DON’T sew over the bottom edge,
leave it open). Now flip the entire piece through the side that’s open so that the
right side of the fabric is shown. Proceed by pressing them.
Take piece 2
and insert it into the side that remained open. Make sure that piece 2
is perfectly aligned to the center and pin it.

Now that they’re aligned and sewn together, carefully trace a 1 ½” x 1 rectangle
an inch under the top of the fabric as shown in the diagram below:
 (Make sure to align the rectangle in the center of the fabric so
that it’s even from each side). Now make a zigzag stitch around the rectangle
(this allows it to hold its shape), then carefully cut above the rectangle that
was drawn.
We are almost done! Now that everything is sewn together, we’re
ready to close the side that was left open. Grab the bottom side and fold each
fabric inside ¼”. Press and sew close to the edge to close it down and you’re finished!


Here is to recharging over the weekend! — Figuratively speaking.
Lastly, some suggestions for alternate fabric combinations to use on this project:
1. Nördika, 2. Reminisce, and 3. Textures


Leave a comment