Hello my quilting friends! I hope you had a great Memorial Day weekend!
Who doesn’t love new tools to create? I am always looking for new gadgets to make and experiment. When I found out that the curvy Flowers Crown quilt from the beautiful Flower Child collection was made with the Classic Curves Ruler, I knew I had to give it a try! My compliments to Color Girl, the creator of this amazing ruler, and the mind and hands behind this feminine quilt.

I love how my unfinished block came out, the curves are perfect and I had zero struggle sewing it. It lays flat, looks clean, and has the ¼” seam allowance in all four edges.
The 10" x 10" finished block is composed by four (4) 5” x 5” finished blocks:

Block 1:

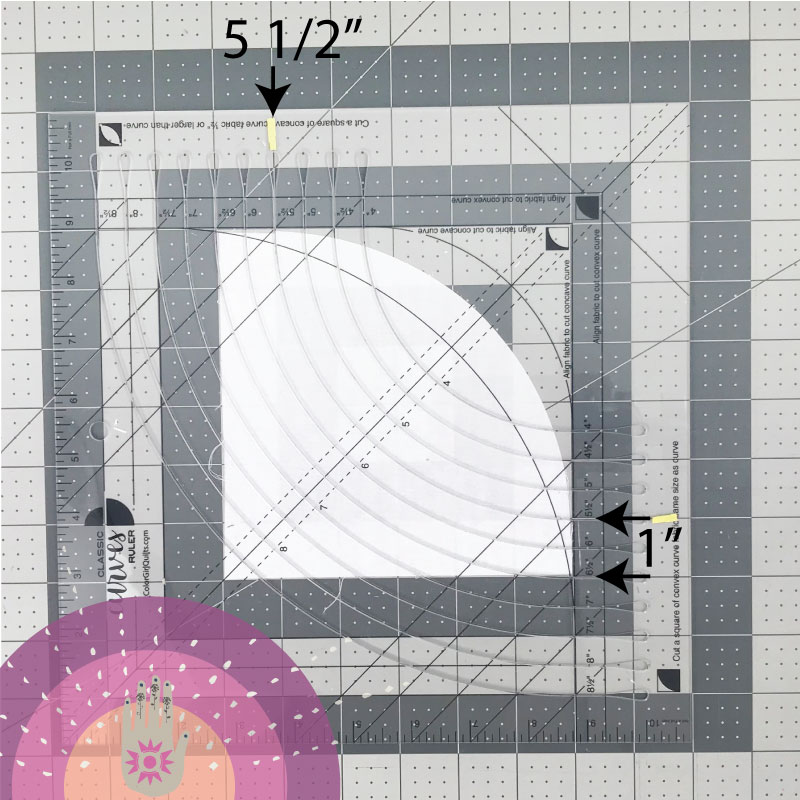
I took one (1) 5½” x 5½” half square triangle block from fabrics a and b, and one (1) 5½” x 5½” square from fabric c.
According to the ruler instructions the finished curve will be ½” smaller than the curve guide, and since I wanted my finished curve to measure 5", I placed a yellow sticker by the 5½” guide.
For the convex part, I aligned the half square triangle block from fabrics a and b to the convex corner and trim along the 5½” guide.

And for the concave part, I aligned the 5½” x 5½” square from fabric c to the concave corner and trim along the 5½” guide.

Once I had my two pieces ready, I pinned them in the center of the curve, and at the ends to make sure they stay in place when sewing. I was careful to remove the pins before sewing over them.

Block 2:

I took one (1) 4” x 4” half square triangle block from fabrics a and b, and one (1) 5½” x 5½” square from fabric c.
Since the finished curve is ½” smaller than the curve guide measurement and I wanted my finished curve to measure 3½", I placed a yellow sticker by the 4” guide.
For the convex part, I aligned the half square triangle block from fabrics a and b to the convex corner and trimmed along the 4” guide.

And for the concave part, I aligned the 5½” x 5½” square from fabric c to the concave corner and trimmed along the 4” guide.

Once the pieces were ready, I pinned them in the center of the curve, and at the ends to make sure the pieces stay in place when sewing, then I saw both pieces at ¼” making sure to remove the pins before sewing over them.

(2) Block 3:

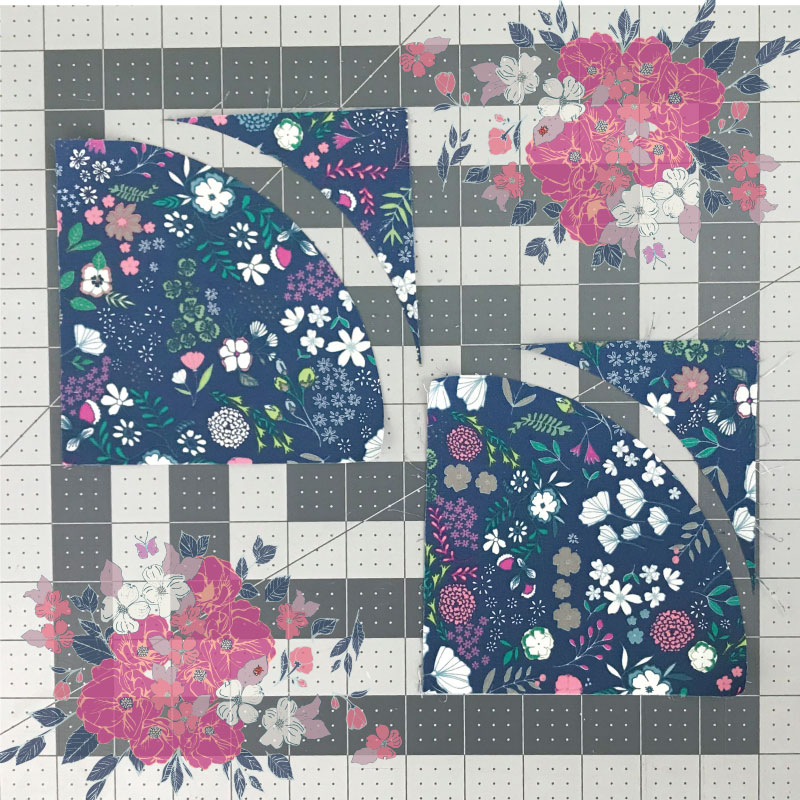
Since I needed two (2) Block 3, I used the technique Color Girl explains in the instructions to get two (2) concave pieces out of one bigger square. For these blocks I used two (2) 5½” x 5½” squares from fabric c and one (1) 7" x 7" square from fabric d. Because she recommends to cut the square at least 1½” bigger than the planned curve, and my planned curve was 5" I cut my square from fabric d to 7" x 7".
The first step was to cut 1" x 1" squares from the two (2) diagonal corners of fabric d:

Then I aligned the 5½” guide with the edges of the 1" squares. Then I trimmed.


To cut the other piece I removed the concave piece and turn the ruler 180 degrees. I align the 5½” guide 1" away from the edge of fabric d and trimmed again.

As you can see in the picture I got two (2) concave curve pieces out of the 7" x 7" square.

I took the two (2) 5½” x 5½” squares from fabric c and aligned them to the convex curve corner, trimmed along the 5½” guide, and got the two convex pieces.

Afer that, I joined them. Since my unfinished Block 3 squares measured 6", I trimmed the excess of the concave part to 5½”.

Finally I joined my four blocks and got this beautiful quarter of flower crown.

So, are you ready to play with the ruler? if you are a curves fan, what are your favorite projects for this shape?

Hands down, this ruler rocked my quilting world!
Happy piecing!!!
Laura


Leave a reply to Peggy Terzian Cancel reply