Welcome back, fabric friends!
Since being home, I've been having a lot of fun practicing some basic sewing techniques. Last week you joined me in some Strip Piecing, but today I wanted to talk about two ways of constructing an Hourglass Block.

Throughout my practice, I found two ways of making this block useful but you may have a preferred preference when it comes to techniques.
So, I took some of my leftover fabrics from Amy Sinibaldi's collections, Mayfair and some matching Pure Solids
 Fabrics used: Shepherd Market, Royal Arcade, Tender Green, and Mauvelous.
I decided to add 1 3/8’’ to my block in order to have more room for trimming. So, if your unfinished size for your hourglass block is 4 1/2’’ x 4 1/2’’, add 1 3/8’’ on each side. Your block should measure 5 3/8’’ x 5 3/8’’.
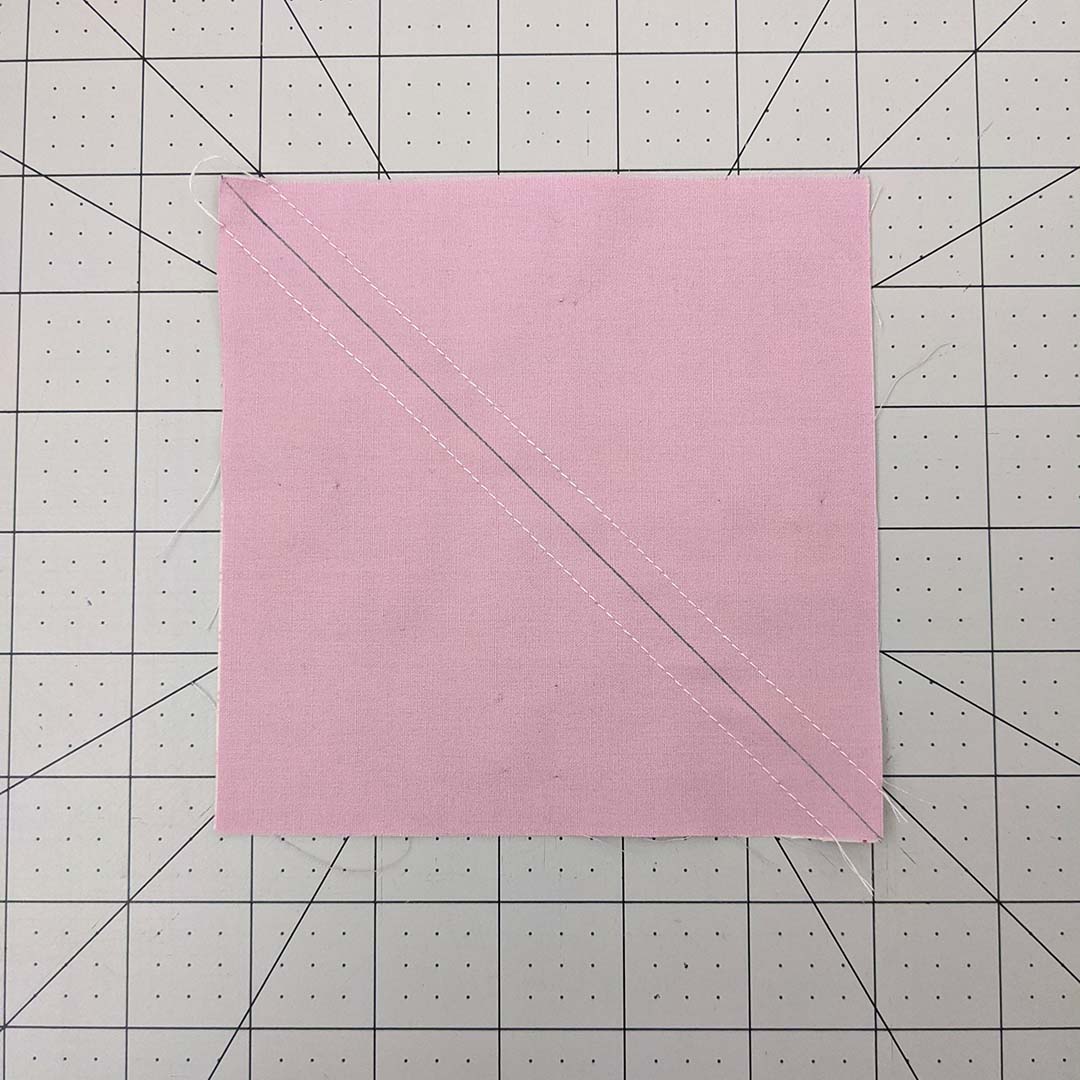
The first method is take fabric A and B 5 3/8’’ squares and place them right sides together.
Mark a line on the diagonal and sew ¼ inch away from the drawn line on each side.

Using a rotary cutter, cut on the drawn line. Press seam open.

Now, place both blocks right sides together but in the opposite direction (so the same fabrics doesn’t stack atop each other)

Draw a line on the diagonal that's perpendicular to the seam line. Pin in place.

Sew ¼ inch on each side of the drawn line. Then use your rotary cutter to cut on the drawn line to create two pieces.
Trim your block to 4 1/2’’ x 4 1/2’’.

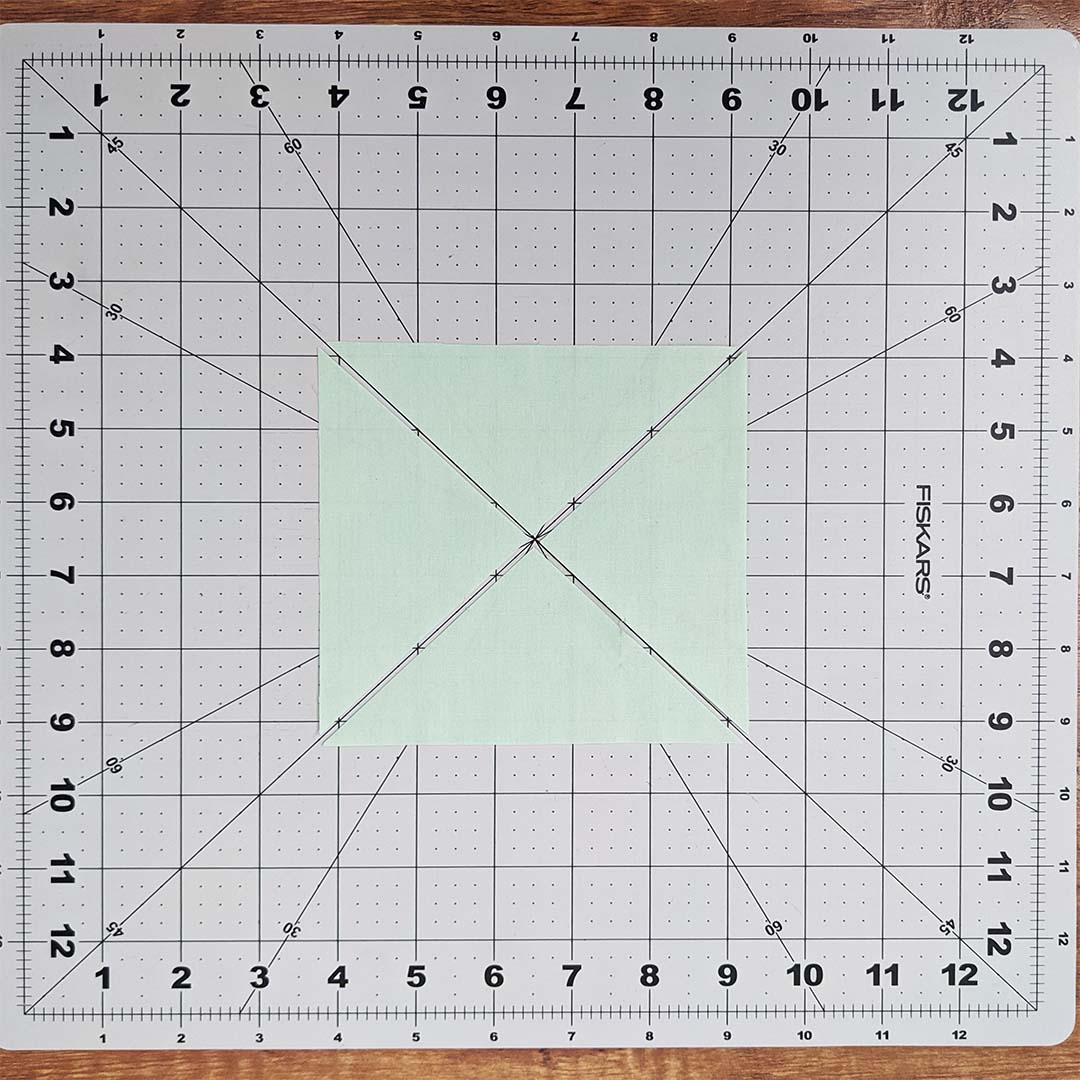
The second method is to take (1) 5 3/8'' x 5 3/8’’ squares from fabrics C and D and cut them in (4) triangles.


Sew two triangles together at a 1/4‘’ seam allowance and then the other two triangles together.


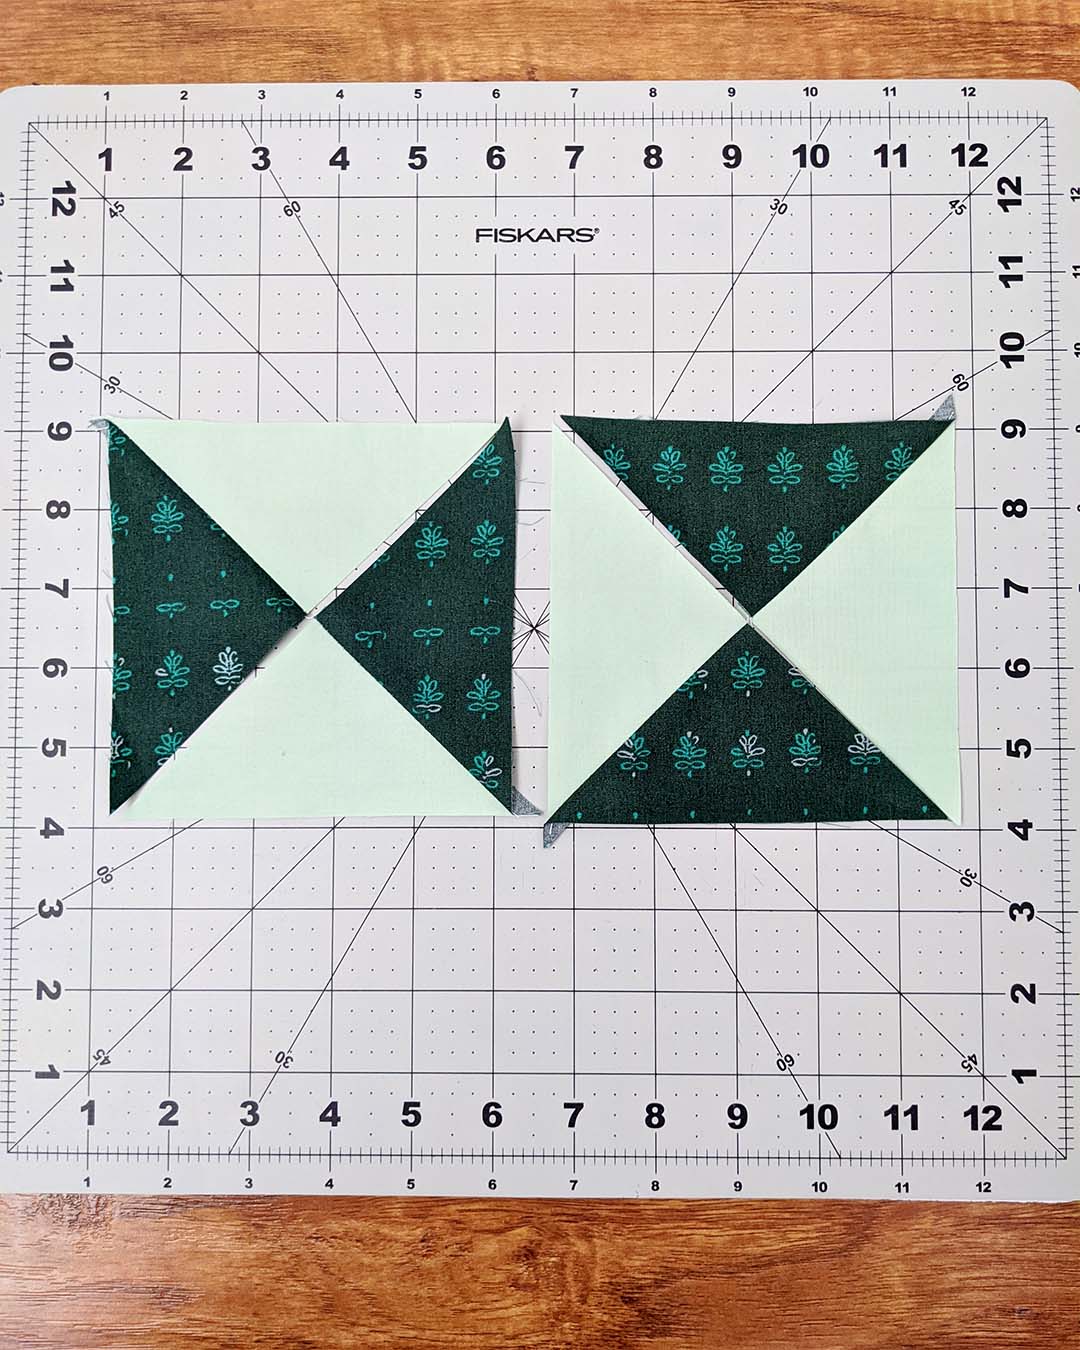
Then, join both pieces together, pin and sew at a 1/4’’. Trim your block to a 4 1/2’’ x 4 1/2’’ and create your second Hourglass Block with the remaining triangles.

Trim your block to a 4 1/2’’ x 4 1/2’’ and create your second Hourglass Block with the remaining triangles.

This method is handy if you want to place the exact position/direction of all the fabrics.

Now, you learned how to construct an Hourglass Block using two methods, which one is your favorite one? Let me know in the comments below!
Happy Sewing,
– Jannelle


Leave a reply to Eleni Cancel reply