Quilted Hat Tutorial

Hello, my fellow makers,

Today I want to take you on my journey of making a quilted hat. Like most of my design stories, it started with scrolling over Pinterest and Instagram. For some reason, I was always drawn to the images of summery and beautiful hats with big brims. When the soft and feminine Rosewood collection came out, I decided to look for a bucket hat tutorial and jump into the adventure. I realized that I could just use my love for improv piecing and the Dresden technique to replace the small brim of the tutorial for a big and quilty one.


Quilted Hat - Updated Graphic BLOG


I drafted and tested the patterns for a medium hat crown, medium hat body, and Dresden which you can download here Download AGF Hat Tutorial Templates

If you would like to size up or down the crown and body, I suggest you go to the YouTube tutorial that I used: Sewing & Drafting a Bucket Hat.

Quilted Hat - GRID2

I had in hand a bundle of fat quarters from the Rosewood collection, some scraps of Raw Gold (PE-485), and one yard of Infused Hydrangea denim (DEN-S-2004). For extra materials, I used fusible cotton batting and 3” stiff horsehair (a trim used to give volume to dresses and skirts and that you can find in any fabric store). 


A-Hat-Tutorial-03


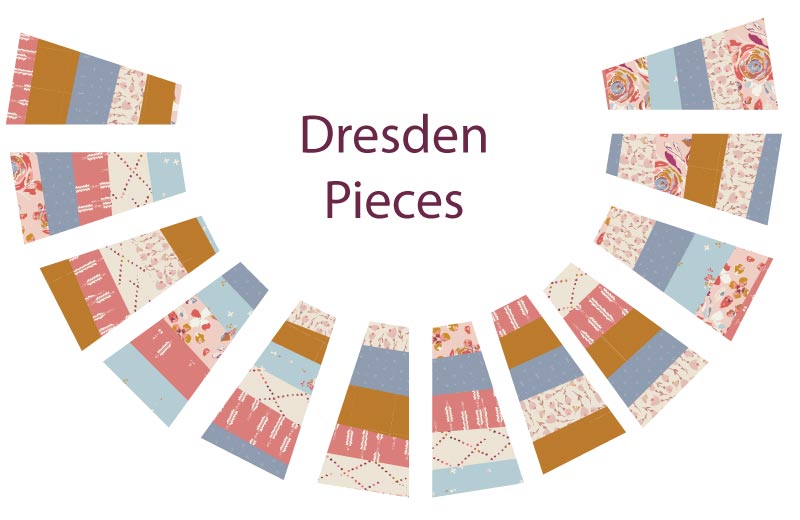
I started by cutting irregular strips of the fabrics I liked the most and then joined them randomly to have three improv-pieced bases. I placed my templates and cut them as follows: One (1) body, one (1) crown, and twelve (12) Dresden.


A-Hat-Tutorial-04

Hat Brim: I took my time to arrange the Dresden pieces before joining them. In the end, they looked randomly perfect and happy ;)

A-Hat-Tutorial-05


Once I had my hat brim ready, I traced it on the batting and the denim, and cut it. I also cut one (1) body and one (1) crown in denim for the lining.


A-Hat-Tutorial-06


I layered the improv brim with the batting brim. Then I joined the edges of the two resulting pieces to get two lampshade like pieces.


A-Hat-Tutorial-07

  1. I took the improv-batting lampshade.
  2. Turned it inside out.
  3. Took the stiff horsehair and started attaching it from top to bottom and around using safety pins.
  4. 5. 6. Kept going until the whole hat was covered with horsehair.

A-Hat-Tutorial-08

7. I took the denim lampshade right side out and placed it on top of the improv-batting one.

8. Carefully I repined everything together with safety pins,  and removed the ones on step 7, making sure the fabric was as flat as possible.

9. This is the most challenging step: I sewed around the brim every 1/4" while removing the safety pins.


A-Hat-Tutorial-09

I took the improv pieced body and the denim body. I joined their ends to make two loops and inserted the denim body inside the improv pieced body wrong sides together.

A-Hat-Tutorial-10

10. I cut a 2" bias strip of denim and used it as binding to clean the big opening of the brim.

Ideally, the brim would match perfectly with the bottom edge of the body. Since I quilted it, it ended up smaller, so I had to trim a little bit of the top edge of the brim until the body and the brim matched.

11. I took the crowns and layered them wrong sides together, and joined them to the top edge of the body.

12. I took leftover denim bias tape and finished the raw edge of the crown. Finally, I topstitched the bias tape to give the hat a more casual look.

A-Hat-Tutorial-11

I hope you enjoyed my adventure! It took me a while and a few mistakes to find the way, and in the end, it was worth it. I love my hat and I take it on my morning walks when I don't want the sun in my face. My favorite part? I don't get hot wearing it because it is made of 100% AGF quilting cotton.

I hope you jump into the hat-making adventure too and share your story with me.

Happy hat making,

Laucara

25 responses to “Quilted Hat Tutorial”

  1. Rosemary B Avatar
    Rosemary B

    this is a very very cute hat. Well done. It looks perfectly snazzy on you!!

    Like

  2. Laura Avatar

    Hi Rosemary! Thank you so much!!!

    Like

  3. Kristen Avatar
    Kristen

    Cute!!

    Like

  4. Laura Avatar

    Thank you Kristen ;)

    Like

  5. Karen Hine Avatar
    Karen Hine

    The hat looks great! For easier construction for your next one, see the Reverisble Sun Hat at https://www.thesprucecrafts.com/reversible-sun-hat-sewing-pattern-4161238. I’ve made a few of those. I might do some more piecing on my next one, inspired by you.

    Like

  6. Laura Avatar

    Hi Karen!
    Thank you for sharing your link. I opened but it says the page is unavailable. Please resend it, I would love to see the hats. It makes me happy you enjoyed the tutorial, I look forward to reading yours.

    Like

  7. Jennifer Avatar
    Jennifer

    Rosemary, I’m in the middle of making this hat. Thanks for your tutorial! My brim is pretty big. I just had a thought that maybe you’re a garment maker and are used to using a 1/2 inch seam. I’m a quilter and used a 1/4 inch seam for joining all my dresdens. Or maybe my brim is just supposed to look really big. Can you clarify what size seam you used to join the dresdens? Thanks so much!!!

    Like

  8. Jennifer Avatar
    Jennifer

    Sorry, Laura! I scanned through the comments and thought your name was Rosemary instead of Laura. So sorry!

    Like

  9. Laura Avatar

    Hi Jennifer, thank you for making the hat and contacting me. I made it using 1/4″ seam allowance.
    The brim is very big, so the Dresden template is very long. Once you join all the Dresden templates you will have to layer the big piece with batting and with the lining fabric (in this case denim), and pin everything in place to quilt it. When you quilt your piece, it will shrink a little bit.
    If you feel the brim is too long, you can cut the Dresden template to your desired size, just make sure to cut the outside side of the Dresden, (the second longest side of the template).
    Please let me know if this answers your question of if you have any other concerns.

    Like

  10. Fabienne Lefebvre Avatar
    Fabienne Lefebvre

    Hello,
    I’m planning on making this hat and had the following question :
    Approximataly what size are your three improv-pieced bases?
    Thank you!
    Fabienne

    Like

  11. Laura Avatar

    Hi Fabienne,
    Since I had fat quarters that measure 22″ x 18″ and I removed the selvage before cutting the fabric into irregular strips, my three pieces ended up measuring around 20″ x 25″.

    Like

  12. Fabienne Boucher Lefebvre Avatar
    Fabienne Boucher Lefebvre

    Great thinks! Smoking forward to making this hat.

    Like

  13. Fabienne Lefebvre Avatar
    Fabienne Lefebvre

    I ment looking forward

    Like

  14. Alice Avatar
    Alice

    Horsehair spirals are the perfect idea! Thank you.

    Like

  15. laucara Avatar

    Thank you Alice, I hope you make it!

    Like

  16. Karen Hosler Avatar
    Karen Hosler

    Lauren, I found the hat pattern at https://www.thesprucecrafts.com/reversible-sun-hat-sewing-pattern-4161238. Hope this helps someone else.

    Like

  17. Karen Hosler Avatar
    Karen Hosler

    Ok, so this link goes to a page not found. Just click on the Home page and use the search box for Reversible Sun Hat. The pattern can be found that way.

    Like

  18. Barbara Opett Avatar
    Barbara Opett

    I love your hat Laucara! I have never used horsehair spirals before. I’m ready to give it a go though, your hat is just too pretty not to. The wider the brim the better, I say. Specially in our Florida ☀️ Sun!

    Like

  19. Laucara Avatar

    Thank you Barbara, I’m sure it is going to come out amazing.

    Like

  20. Laucara Avatar

    Thank you Karen,
    I love that tutorial! I will make sure we use it in one of our upcoming lookbooks.

    Like

  21. Nancy Avatar
    Nancy

    Hi- fun hat! We are making this hat during a quilting retreat. How much stiff horsehair canvas do you need per hat?
    Nancy

    Like

  22. Laucara Avatar

    How exciting Nancy!!! I would love to see the results. I don’t remember how much I used for this hat but to be in the safe side I would get 8 yards of 2″ horse hair per hat. Worst case, you will have more and can return what you have left.

    Like

  23. Nancy Avatar
    Nancy

    I will definitely send you the pictures! We are excited to do this. In your instructions above you used 3 inch horsehair, and in your comment to me you said 2 inches. Do you have a preference for one over the other?

    Like

  24. Laucara Avatar

    Yes! 3′ horse hair, the 2″ was a typo. I look forward to seeing the pictures <3 you can send them to Laura.guerra@artgalleryfabrics.com

    Like

  25. Beth Avatar
    Beth

    My first one didn’t exactly match up…the top round piece didn’t match up with the body. And that unit didn’t match the Dresden unit. I wish I cut the lining for the dresden unit longer… because it shrunk up as I sewed around. I will try again and see if I can quilt it on my longarm before it gets turned into the lampshade.

    Like

Leave a reply to Barbara Opett Cancel reply

We’re AGF

At Art Gallery Fabrics®, we aspire for the best, from creation to delivery with reliable quality, and top customer service. We believe strongly in the quality of the fabric that is transcended in our superior thread count and fine weave, our mills uphold sustainable printing methods and are OEKO-TEX certified 

Latest Lookbook

Let’s connect