
Ever since we received our Flannel fabric here at AGF, I’ve been fascinated with the material and brainstorming all sorts of projects that can be created with it!
I’ve been wanting to make a long scarf for a while and what a better way to use our new Flannel substrate since it’s extra soft and cozy.
In this tutorial, I’m going to show you how to make a flannel scarf with fringes. It was fun experimenting with this fringe as I pulled each thread one at a time, but just take your time and enjoy the process!
To make this scarf you will need 2 yards by the Width of Fabric (WOF) of the “Wondering with Bear” Flannel print.
Before you start this project, make sure to take note that you will be creating the fringes perpendicular to the selvage, since that’s where it will be easier to unravel the fabric and overall be a better look for the fringe.

Fold your fabric right sides facing together. Lay your piece flat making sure it’s folded evenly. 
Pin your edges and sew inside the selvage.


 Turn your piece inside out and press.
Mark a 1’’ line from the top in and bottom in edge with an erasable pen.

Edgestitch your sides and on the marked lines.

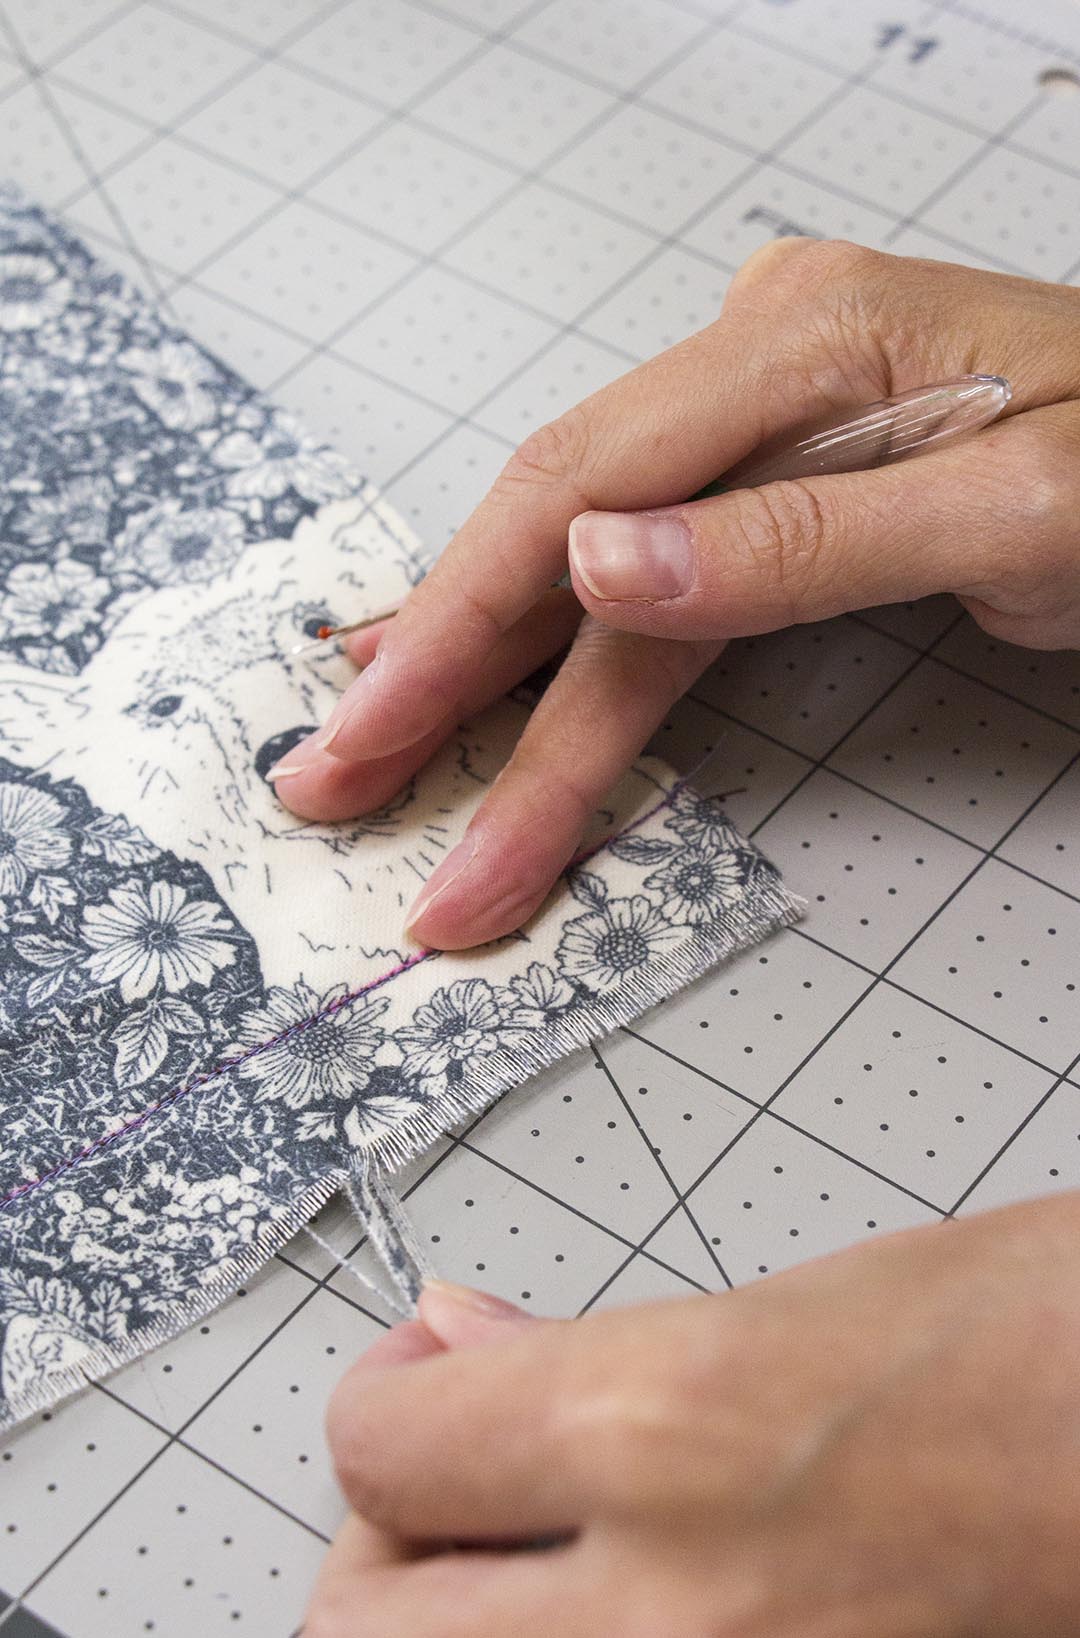
Stitch again on top of the marked lines to create a stronger stitch before you start pulling the threads. 
Take a seam ripper and start separating and pulling thread by thread until you create your fringe.

Continue pulling thread one at a time, until you have created 1’’ of fringe.
Repeat the same on the other edge of the scarf.

Take an old brush in order to brush and clean any leftover thread and tada! You’ve got yourself a beautiful flannel scarf.

And you're done! If you make this beauty for the winter, make sure to tag us on social media using the hashtag #AGFFlannel, so we can share the love!
Until next time,
Happy sewing!
-Jannelle


Leave a reply to Nathania Cancel reply